1. Adding a new patient via 'Invite'
2. Viewing assigned assessments
3. Assigning a new assessment from a template
4. Viewing a patient log
5. Navigating the patient overview dashboard
6. Exporting a PDF report
7. Adding and amending invervention events
1. Signing in for the first time
2. Adding a patient to your list from 'your organisation'
3. Creating a new assessment template
4. Recording a patient assessment in-person using your own device
5. Archiving and un-archiving a patient log
6. Amending patient details
7. Changing the default assessment countdown timer
8. Activating Multi-Factor Authentication (MFA) on your account

The assessment will now be available for the patient to perform. Once an assessment has been performed by a patient it will be logged for both patient and clinician to view and you will receive an email to notify you.
You can view a patient's progress or deterioration on the homepage using the dropdown arrow. For more detail click on your patient's name to navigate to their page

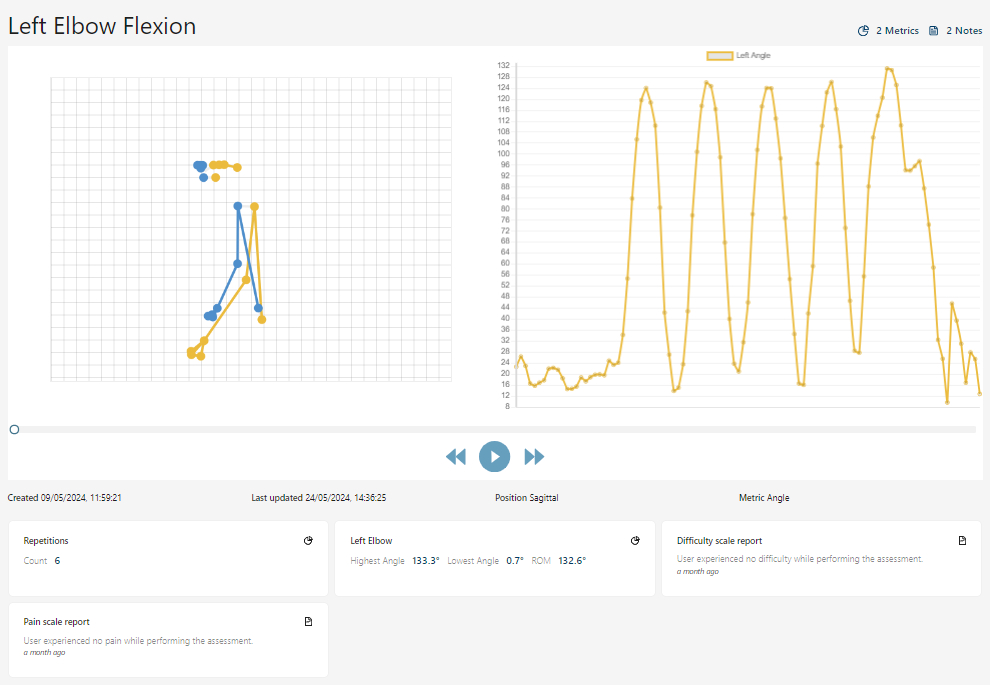
In the 'Patient logs' tab, click on the name of the log you are interested in

You will then be presented with detailed data and an avatar view of the patient performing their assessment